

Cover
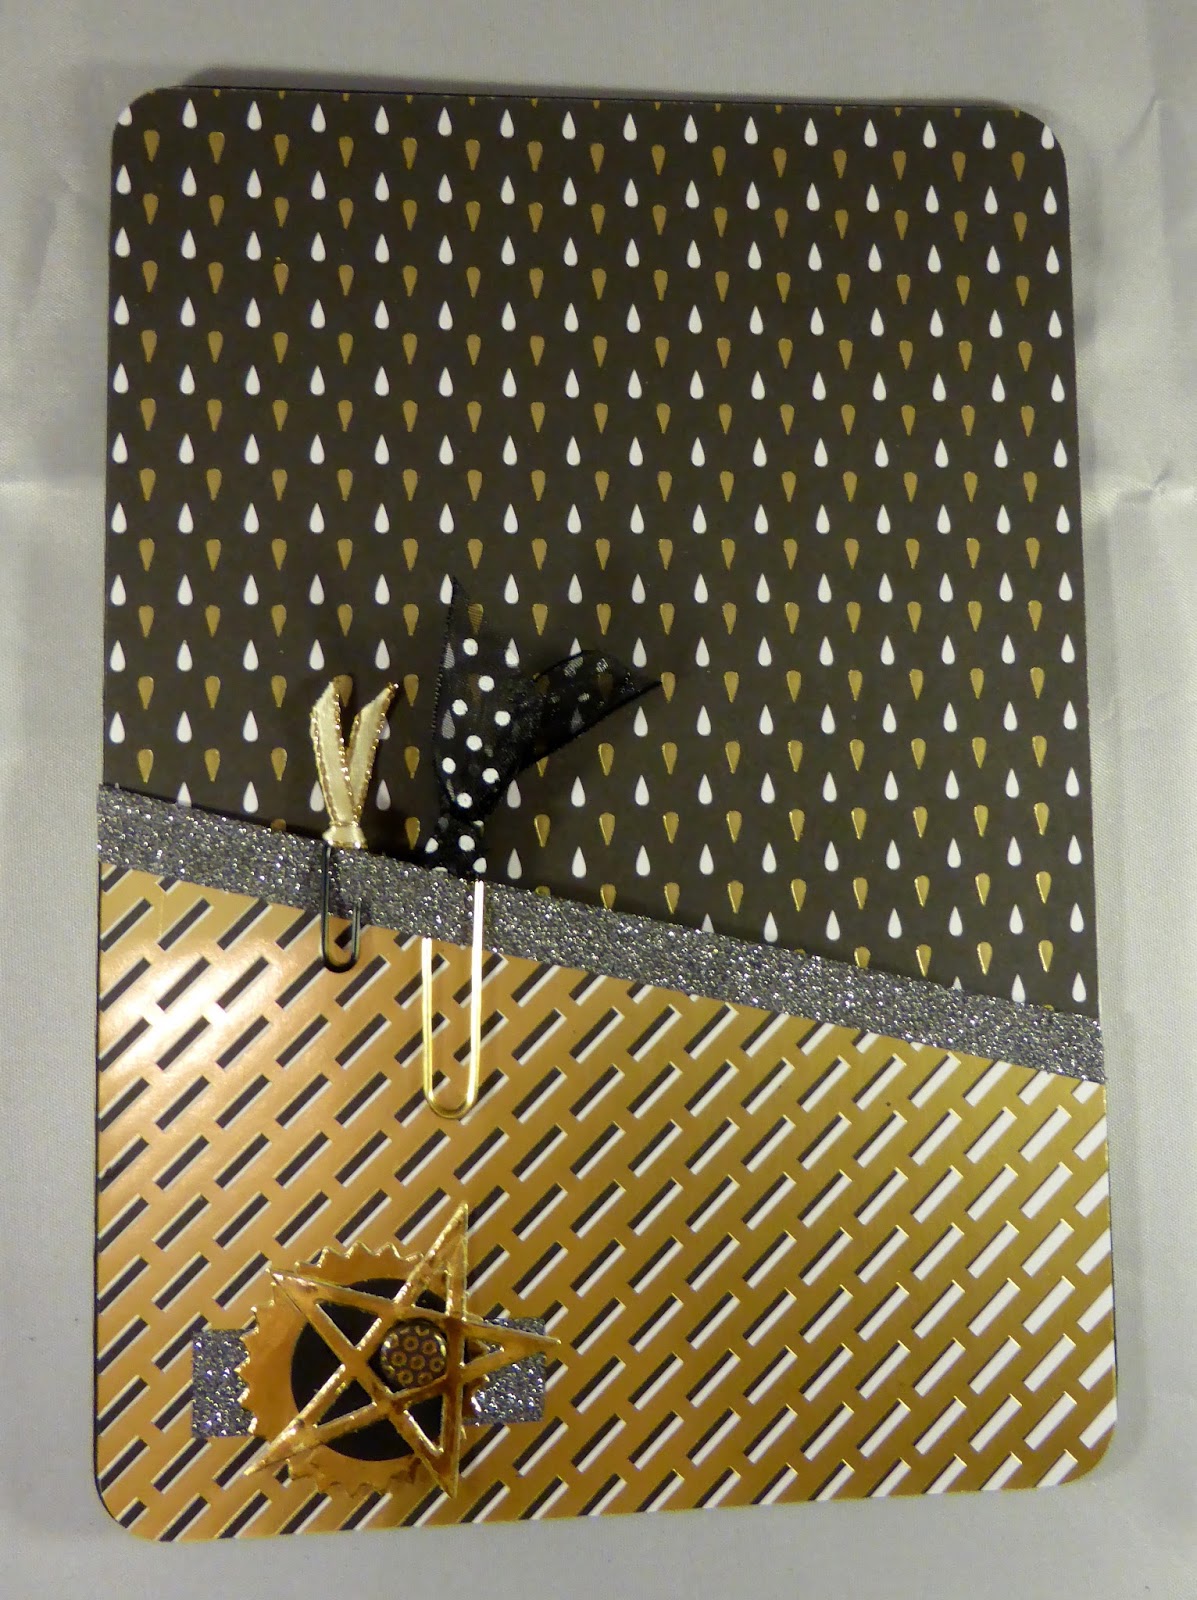
I like to get organised so set to and
decorated my album cover. Experience and a lack of places to store
completed albums has taught me that lots of embellishments and paper on
the cover doesn't work for me. There's nothing as disappointing as
watching all that hard work get squashed and torn with handling
as there's lots of little fingers in my family so everything needs
to be a bit robust.

But
I did want to make my gorgeous golden beauty my own, so after much
deliberation I decided to decorate the spine. And tried hard not to get
carried away!

A
couple of bits of paper from the Kaisercraft collection were cut to
size, a die cut star with a candi dot in the centre and a triple ribbon
bow were quickly added to the title slot thingy - does it have a proper
name? Then some number stickers were goldened up with a little ink and
added below.
And I'm happy with how this looks and can live with any mishaps that might occur.
So having got the cover all sorted my next job was to create a title page. And this is more elaborate as I know it's going to slide into a page protector.
You'll probably notice my style is quite simple, unfussy and I was going to say CAS, but I think NAT - neat and tidy - sums it up better.

I started by selecting a sheet of patterned paper from Kaisercraft's A Touch of Gold collection and cut it to size - 6" x 8". I also knew I wanted some mirror gold and a sentiment tag, so they got put into the mix straightaway.
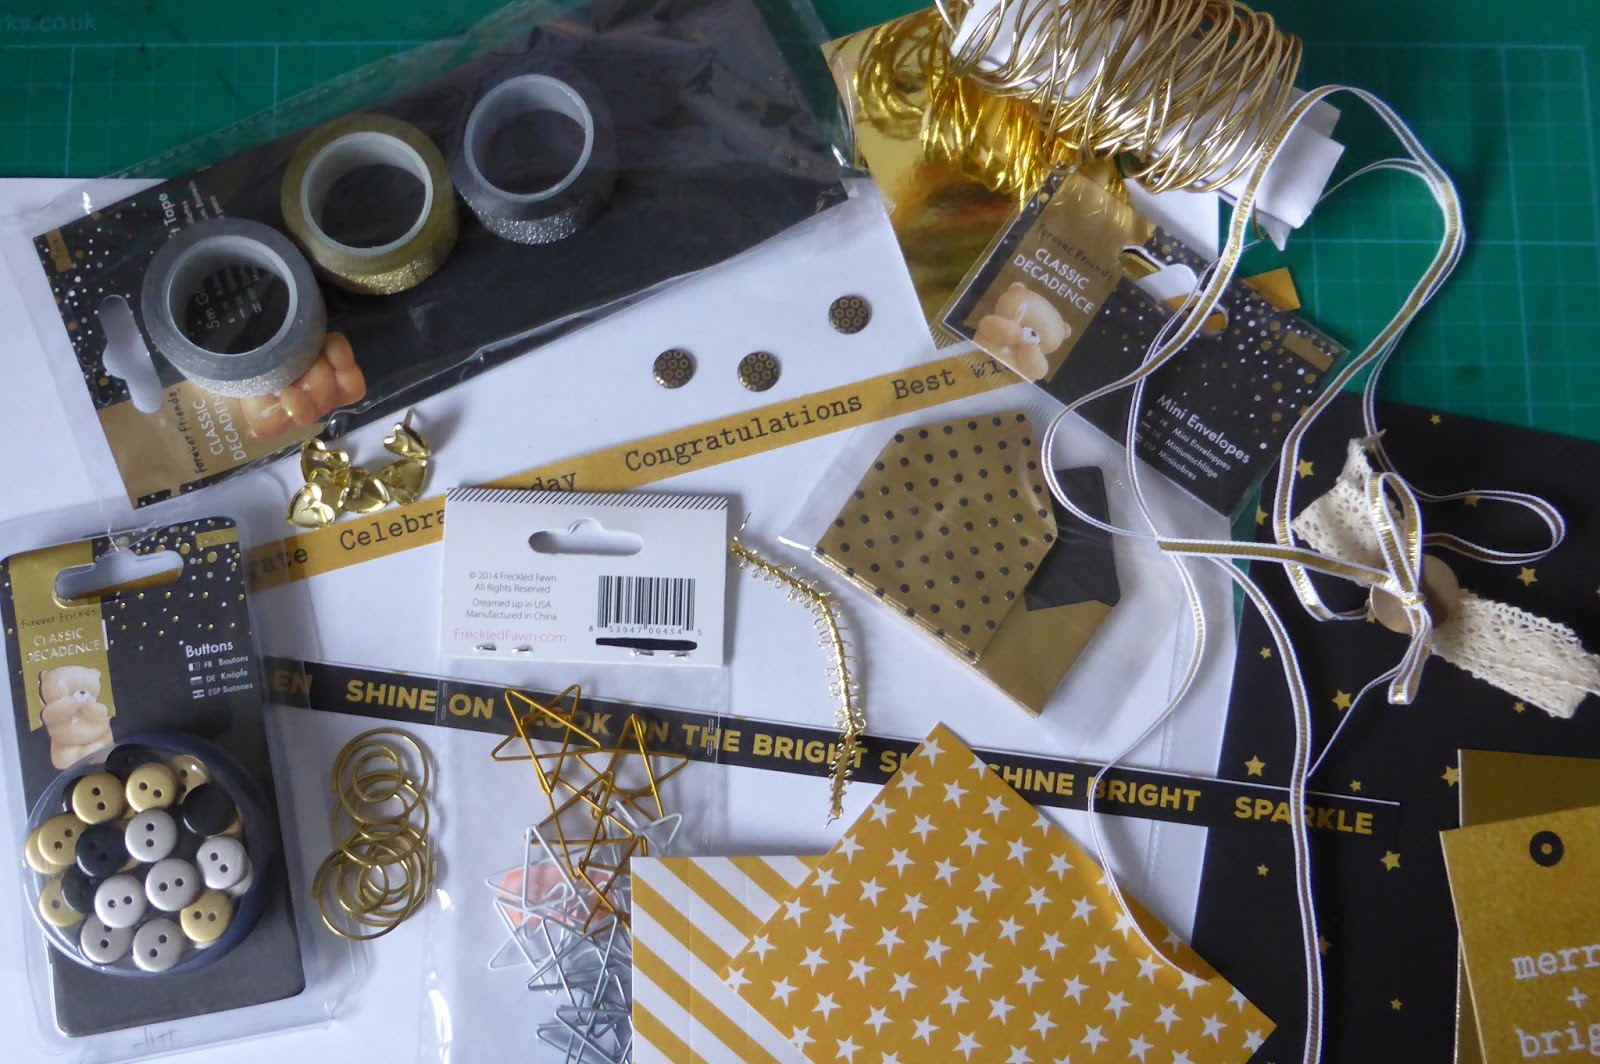
Next I gathered together a few - quite a few - bits and pieces from my stash store I might use and spread them out on my craft table.

A twine bow was added to a button embellishment cluster saved from a gift from Christmas 2014. This was the next item to be placed and then some inspirational words. Nothing is stuck down at this stage as I like to move things around until it works.

I die cut the 2015, using Lawn Fawn's Louie's 123s, and placed that on the page which in turn led to the trimming down of the three words to one. It still looked a little bare, so cut a circle of American Crafts Vellum Wonder and a rectangle of Forever Friend's A5 foiled paper to slip behind the embellishment tag cluster. Now am ready to stick things down.

My final touch was the addition of a star paper clip - from Freckled Fawn - hanging off the bottom of the tag.
Loving the drama of the black and gold, how about you?

Remember this photo of my page preparations?

Here's how it's progressed. First up I tackled the number card. I chose the Becky Higgin's card with hello at the bottom as it seemed appropriate for a first page. I added a die cut snowflake - Die'sire - behind the gold matted number and decided to leave it at that.

Next moved on to my journal card adding some black sparkly tape across the top, a small die cut scalloped square and black punched circle behind a twine threaded button.

I always like to start my album with some good intentions for Christmas - nothing high falutin, just things I want to remember. I used number stickers from a Mambi Happy Planner pack - yes I'm into Mambi planning too! And just finished the card off with a die cut snowflake and gem, both gifts from a Pocket Letter penpal - have I mentioned I do that too?


And that's my first page completed - feels so good!

Day 2

For today's number I used a Technique Tuesday Magic Circle die and popped the matted 2 onto the circle part. I've kept the negative part of the paper and that might just be appearing further down the line.

I made the December label on my computer and printed it onto some patterned paper before hand cutting it close to the letters.

To today's journal card, like yesterday, I attached a strip of washi across the top. Then added an arrow die cut from the same paper as the number card pointing to a gem embellished star. The golden heart is a brad I've had in my stash forever.

The journalling took up all the rest of the space, but did sparkle up the Katie Pertiet border with some Wink of Stella - never shows in photos, but it is there.

Here's how the finished page looks with a photo of Mr Toad and the back of yesterday's shaker.


My final touch was the addition of a star paper clip - from Freckled Fawn - hanging off the bottom of the tag.
Loving the drama of the black and gold, how about you?
Day 1

Remember this photo of my page preparations?

Here's how it's progressed. First up I tackled the number card. I chose the Becky Higgin's card with hello at the bottom as it seemed appropriate for a first page. I added a die cut snowflake - Die'sire - behind the gold matted number and decided to leave it at that.

Next moved on to my journal card adding some black sparkly tape across the top, a small die cut scalloped square and black punched circle behind a twine threaded button.

I always like to start my album with some good intentions for Christmas - nothing high falutin, just things I want to remember. I used number stickers from a Mambi Happy Planner pack - yes I'm into Mambi planning too! And just finished the card off with a die cut snowflake and gem, both gifts from a Pocket Letter penpal - have I mentioned I do that too?

As it's the first day of December there wasn't really a lot to
photograph - I know soon there'll be far too much! So decided to make
the bottom right pocket into a shaker. I popped a couple of die cut
stars and the word magic inside along with the obligatory sequins and
simple stitched across the top to stop them escaping.

And that's my first page completed - feels so good!

Day 2

For today's number I used a Technique Tuesday Magic Circle die and popped the matted 2 onto the circle part. I've kept the negative part of the paper and that might just be appearing further down the line.

I made the December label on my computer and printed it onto some patterned paper before hand cutting it close to the letters.

To today's journal card, like yesterday, I attached a strip of washi across the top. Then added an arrow die cut from the same paper as the number card pointing to a gem embellished star. The golden heart is a brad I've had in my stash forever.

The journalling took up all the rest of the space, but did sparkle up the Katie Pertiet border with some Wink of Stella - never shows in photos, but it is there.

Here's how the finished page looks with a photo of Mr Toad and the back of yesterday's shaker.

Day 3

Today's number card starts with a golden embossed Uniko stamp with the number mat centred on top of it.

I finished it off with a narrow ribbon. The ribbon is wrapped round and stuck on the back and then a smaller piece of ribbon is tied round it to give the appearance of being knotted. I find it keeps things flatter doing it this way as I always curl up the base paper or have the ribbon too slack if I try to just tie it round.

The journal card has a little cluster at the top made from four different dies and an enamel dew drop sticker. You'll notice on the finished layout the card is slightly different - that's because I forgot to take a photo before I wrote on it, learning the ropes as I go along!

The cluster is on the right hand side and I added a little piece of paper washi tape at the bottom of the journalling.

And here's the finished page:

Day 4

Another stamped image for today's number card, but this time stamped it onto a scrap of card and die cut it before adhering it to the base paper. It was difficult to get a good clean image on the slightly embossed base paper so this seemed the best way to overcome that problem.

I finished it off by adding a piece of knotted twine - once again using the same method as explained above.


And the completed page:

Day 5

Today's number card uses the same Uniko stamp as day 3, but this time embossed in black. I also added part of the negative die cut left over from day 2 and a couple of adhesive gems.

These five number cards will form the basis of all the rest of my number cards and will be repeated throughout my album. I like how this give continuity and flow through the album and also means I can get on and prepare them all before things get too hectic.

The journal card is very simple and consists of a piece of washi tape with a little envelope stuck on top. I popped a star paper clip to the flap.

And the completed page:

I often add digital elements to my photos and so far they've all been Katie Pertiet designs that I buy from Designer Digitals.
Day 6

I've added a label to the base number card to reflect one of the stories I've journalled about.

The journal card has two small
strips of washi tape, three sequins and the addition of an arrow
paperclip pointing down to the journalling.

I've
now completed six different types of embellishments to my base journal
cards and will be repeating them throughout my album - you'll remember
I'm doing the same thing with the number cards.

Here's the completed page:

Day 7

The number card uses a similar but different die from day 2, but keeps the same placement of the matted number and the addition of a shaped handcut computer generated word.

The
journal card is the first of the repeated embellishments, once again
placed to the right because of the position of the journal pocket in my
album. I've written my journalling as a list and used gems for the
bullet points and also scattered smaller gems through the bottom
border print.


I took a photograph of a letter from one of my grandsons for the page pocket and then tied the original with golden ribbon, added a tag and slipped it into the pocket on the back of day 20's insert.

Oh and in case you've spotted the ribbon ties on the pocket insert they were added as I punched the holes on the wrong side and wanted to make it look deliberate - hush don't tell!
Day 22

Another quick and simple page focussing on the oldest and newest tree ornaments.


And here's my completed page:

Day 8

The first part of today's page is quite straightforward and follows the pattern I've already set.

All
of the photos in my album so far have been portrait and have been very
careful to turn my camera as I knew the wallet pockets were more suited
to this orientation. But I knew the time would come when a photo just
had to be landscape and that happened today.

So used a page protector with a 6" x 4" pocket at the bottom and two 3" x
4" pockets at the top. I slipped a favourite pice of patterned paper in
the top left pocket and a strip of golden openwork ribbon in the right
pocket. I die cut two stars and glued them back to back onto the ribbon.

Have
you noticed the ribbon tied paperclip? That's holding an extra
journal card in place behind the photo. I cut a 6" x 4" piece of
card, stamped a row of trees across the bottom and then threaded beads
to make a border above the trees.

I wrote my extra journalling and then hand drew the lines.

And
also decorated the back using washi tape - this also covered the tape
holding the bead string in place - and added even more journalling.

Day 9

A
special day for me as it's my grandson's 1st birthday. The extra page
from yesterday was really useful here too as it meant I could use more
photos than a normal page would allow.

The
back of the ribbon works well on the top left pocket and added a
piece of patterned paper with a die cut one and letter stickers to the
top right pocket. I photoshopped two photos to fill the 6" x 4" pocket.

The rest of day 9's page follows my usual pattern.
Day 10

The only thing of note on this page is the use of the left over border from day 7's number and the addition of three golden sparkly hearts to the number card.
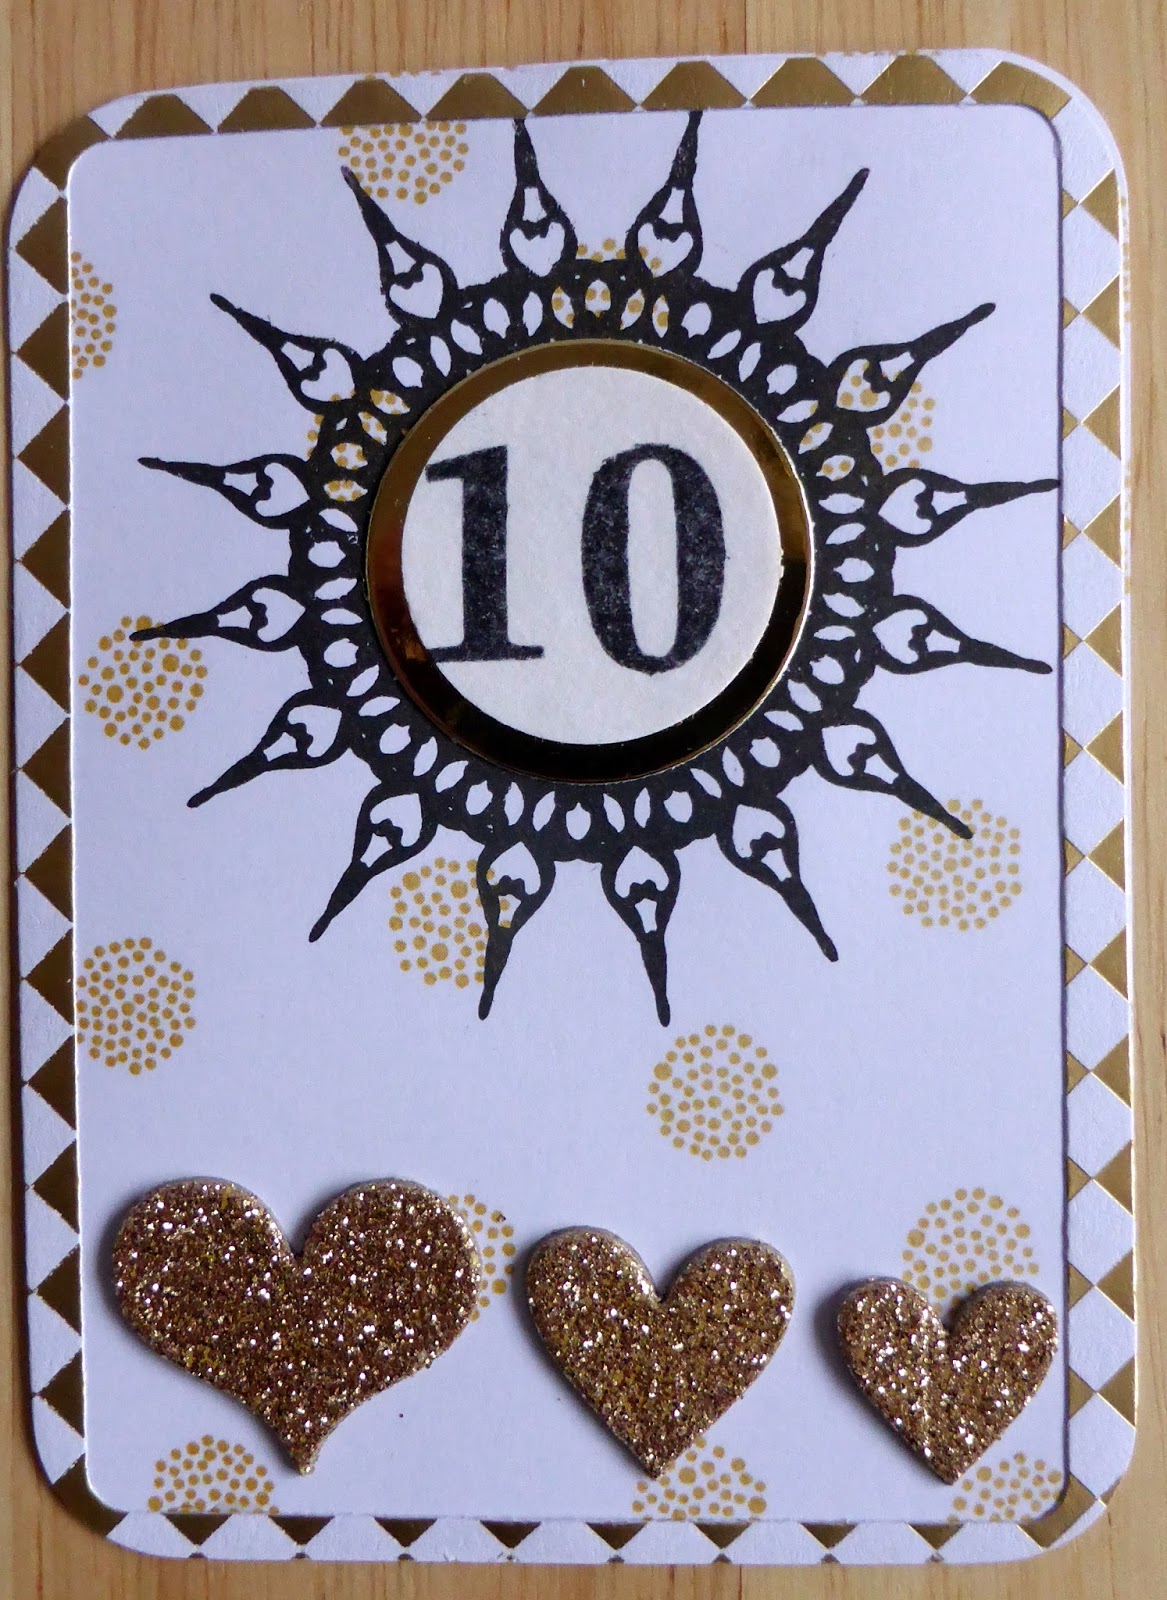
And here's the finished page:

Day 11

A couple of quick easy pages following my set pattern.

I did get a bit creative by doodling stars on the journal card.

Day 12

A closer look.

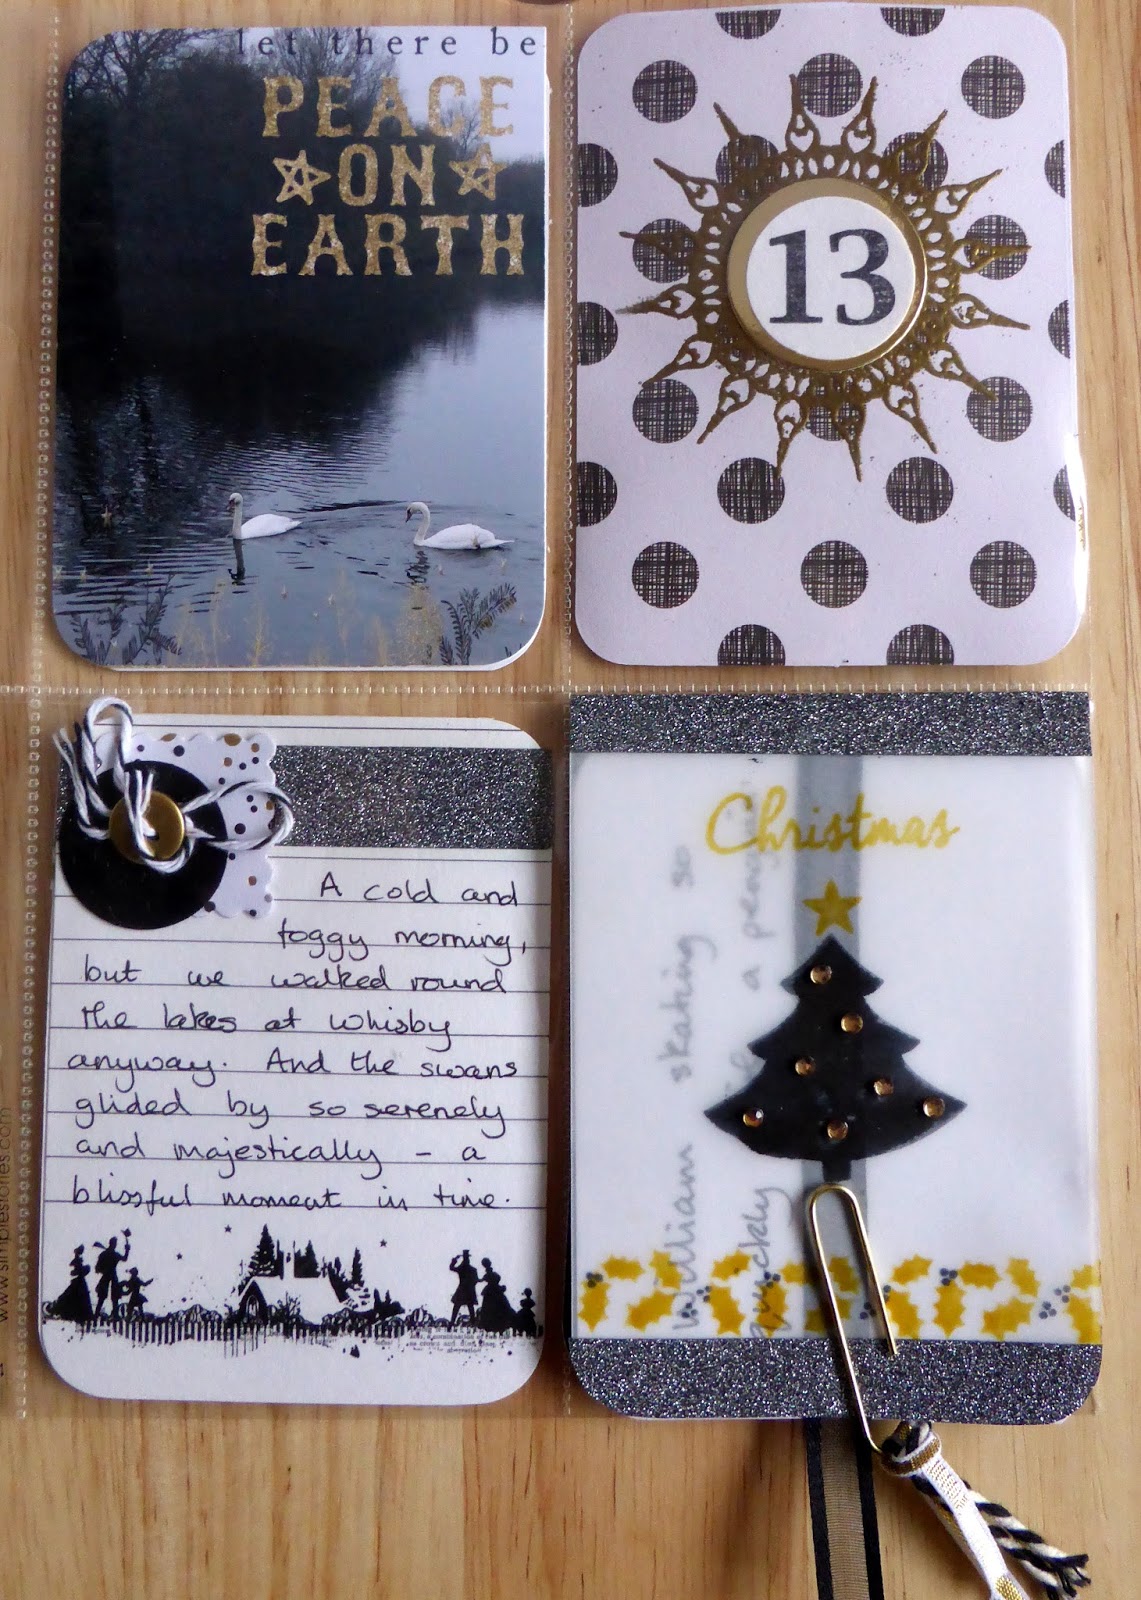
Day 13

Today
I had to put my thinking cap on to work out how to include several
unconnected photos. So decided to make a little flap book using parchment
as the front and back covers - only the back cover and the bottom photo
goes into the album pocket.

I stamped the tree, holly border and greeting and then added some glittery washi tape and gems.

I
glued the photos to a piece of ribbon and then folded them concertina
style and journalled on the back of each photo to remind me what it was
about.

I
left a length of ribbon at the top to pull the photos up then
realised the photo strip would fall out when the album was picked up so
added a ribbon tied paperclip to hold it in place.
Day 14

There was nothing much happening today so decided to feature some of the candle lit decorations round my house.

I found a little candle poem for my journalling and doodled a bit with black and gold pens.

Day 15

Another
page needing some adaptation as I wanted to include several landscape
photos. I used a page protector with two 3" x 4" pockets at the top and
one 4" x 6" pocket at the bottom as the base. Then cut up a 12" x 12"
page protector into individual 6" x 4" pockets. I attached two of them
on top of my base protector and machine stitched them together to give
stability.

I
made an extra large journalling card to slip into one of the pockets,
managing to pick off the circle & star embellishmentstack from the
pre-prepared card.

Here's how it looks when open (above) and closed (below).

Day 16

This
page includes the back of that 6" x 4" bottom pocket. I added my
journalling card and a quotation card side by side with a little
repositional glue to keep them in place.

Day 17

Today I made a stamped transparency for one of the pockets.

I
used staz-on ink to stamp part of the bauble stamp from Honey Doo
Crafts. Then added some sequins and gems to both sides of the
transparency.

I added the golden tree on the photo to cover the faces of a couple of folks who I couldn't avoid including in the shot.

Day 18

A
simple straightforward page showing the back of yesterday's stamped
transparency pocket - love how it looks peeping through to day 16's
number card. I added a strip of ribbon to the number card and doodled
with my gold glitter pen on the journal card.

Day 19

A
straightforward following my pattern album page. I added glitter to
both the number card and the journal card - glitter seems to be
happening more as Christmas gets closer

Day 20

I
added a pocket page to contain all the present receipts. Started with
3 patterned papers and 1 piece of black card all sized to fit my album.

I cut the black card and one piece of patterned paper diagonally and rounded all the corners.

Then glued them together to strengthen and stiffen the patterned paper.

I put washi tape along the diagonal edge and folded it over to make a
sealed edge for the pocket top. This was repeated with the other two
halves to make a second pocket.

The other two pieces of patterned paper were glued back to back and then the pockets were added using strong doubled sided tape.

Added an embellishment cluster to the bottom of each pocket.
I attached two paperclips to each pocket top to make it easier to to slip in the contents.
Day 21

I took a photograph of a letter from one of my grandsons for the page pocket and then tied the original with golden ribbon, added a tag and slipped it into the pocket on the back of day 20's insert.

Oh and in case you've spotted the ribbon ties on the pocket insert they were added as I punched the holes on the wrong side and wanted to make it look deliberate - hush don't tell!
Day 22

Another quick and simple page focussing on the oldest and newest tree ornaments.

Day 23

Today
I got a bit creative and made a tree card using washi tape and random
sewing. I used a snippet of ribbon for the trunk and although
initially thought to leave the threads long and hanging later decided
to trim them down.

I added some stamped stars and sentiments and glued on gems, sequins and a paperlip swirl with a star in the middle.

Day 24

A page all about Santa and my own deliveries too! I jazzed up the number card and featured some of the many Santas around my house. I always like to include photos of the decorations and it's a useful topic for days when not much is going on.

Day 25

I started today's pages with a larger number card and some special words along with a photo of before the mayhem.

I've included several extra pages of photos - on my blog here if you're interested - and finished today's pages with a double pocket of journalling and included a Santa tag I made for a challenge - here. I linked up the two journal cards by continuing the washi tape line outlined in gold and also doodling in gold on both cards.

Day 26

A simple page reflecting the relaxing day.

Day 27

Simple page following my format.

Day 28

A double page of photos as my three grandsons exchanged presents today.

I
added some stickers to the number card and digital sentiments to the
photos. Up there with my favourite moments of this Christmas.

And since I had the stickers out popped some on the outside of the page ptotectors too!
Day 29

Another
straightforward simple page - the time for creativity is waning as I
enjoy and entertain my grandchildren, but that is exactly why this PL
style suits so well.

Day 30

Day 30 also is a simple page - Christmas money was burning a hole in this 6 year old's pocket!

Day 31

I
made a charm to hang on the number card to make this last day of
December page a little bit unique. I glittered up a wooden star and
threaded it along with a large heart paperclip onto black ribbon and
stapled to the number card. I also jazzed up the journalling card with
black glittery gems and golden stars.

Completed album
YAY! I finished my album and kept it updated each day through December and stayed calm - well relatively - with sharing the process here at LDD.

I added a gold elastic tie round the album to keep it tidy - it's a bit bulky and did begin to wonder if everything was going to fit. And I made a little charm to hang from it.

A close up of the charm.

The last pocket in my album contains a collage of photos which didn't make it onto the main pages as the quality was not the best. I often use this method to include those wobbly, but favourite photos, the small format seems to disguise the imperfections.

And my final page is a simple goodbye to 2015.

Here's my completed weather chart which is tucked safely behind the goodbye 2015 page.

I really love my golden album and the PL format was so easy to keep on track and not get overwhelmed and fall behind during busy times. I also loved that so much of the pocket contents could be made in advance or during quieter times.
Looking back over all my December Dailies I realise that, although all very different, they have one thing in common - every page is the same shape and most the same size. So maybe 2016 will be the year to break out of this format and go for something a bit more random. And I've also got my eye on some papers with a blue & brown colour scheme.

Dont forget you can link your pre-planning or stash photos up
HERE....
And if you have your Covers done....
upload them HERE
And you can even share your previous December Daily's
HERE
Oooooo! Such a gorgeous opening to your 2015 album. The black and gold is just stunning, Jane.
ReplyDeleteThanks Deb :)
DeleteGorgeous! What a fabulous color scheme!
ReplyDeleteThanks Team Clark :)
DeleteLove it! NAT, eh? Well, this page is very NATTY indeedy! Gorgeous colour combo & loved seeing how it came together :):)
ReplyDeleteYeah I made up the NAT! Thanks Lizzy.
DeleteLovely title page and I love the color combination too :) I liked your process and I'm really starting to see what layering does to enhance the look of something and the layering was a perfect touch for the title page :) NAT for sure :)
ReplyDeleteThanks Tina :)
DeleteTotally love the drama of the black and gold! The spine and the title page looks very luxe!
ReplyDeleteThanks Mandy :)
DeleteLove this Jane
ReplyDelete